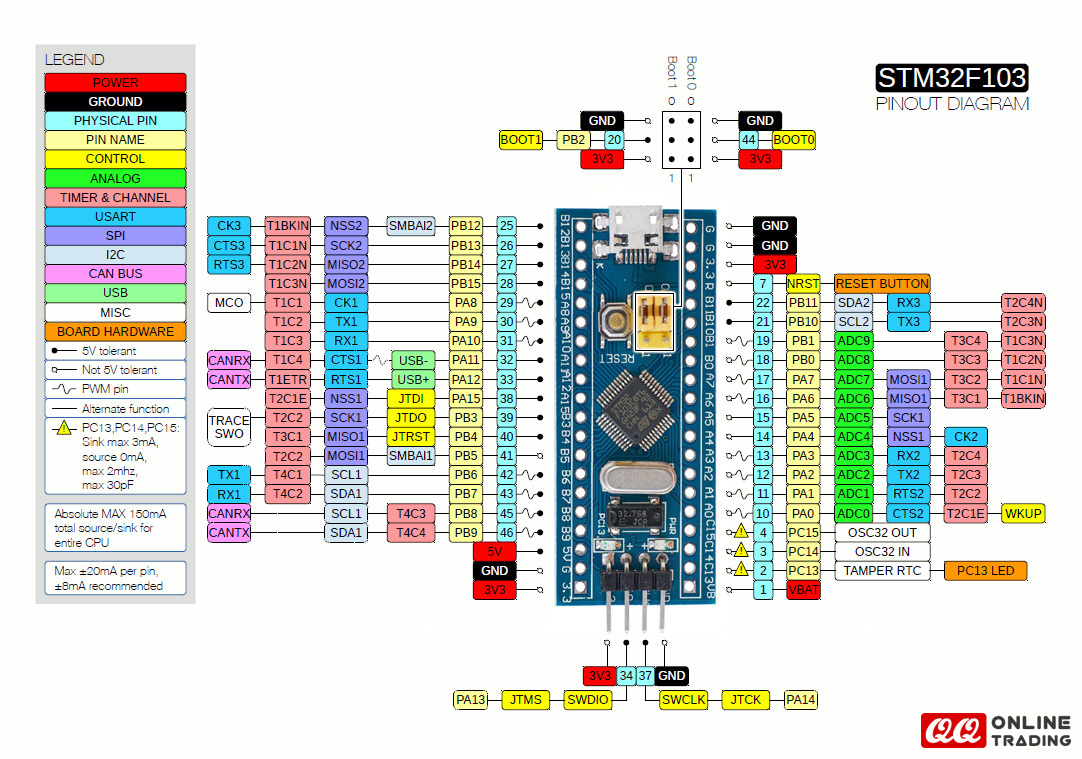
Minimum System STM32 (Blue Pill) ARM Cortex M3 72Mhz, 64kB Flash, 20Kb RAM - STM32F103C8
-
RM25.00
- Product Code: STM32F103C8T6
- Availability: In Stock
Programmer for STM: ST-Link v2 Programmer for STM8 STM32
The “Blue Pill” name, by the way, appears to have originated in the STM32duino forum.
For beginners, it might be difficult to use the popular and cheap blue pill board based on STM32F103C8T6. It’s because using an embedded development tools like KEIL isn’t easy for beginners. This 32bit microcontroller based on ARM Cortex-M3 architecture is far better than your traditional Arduino board. You can compare it to Arduino DUE but it has got a very small size like the Arduino Nano. There’s lack of proper documentation on it and everything available on the internet is quite scattered. So, here’s something to get you started easily.
Features
Specifications
Package Includes
1 x STMicroelectronics STM32F103C8T6
2 x 20-pin Pin Header
Software installation
A bootloader needs to be flashed using USB to Serial or ST-Link (SWD). See Flashing the bootloader
Follow the normal Installation guide.
Note that after first flashing the bootloader you may have to place the board into "perpetual bootloader" mode before you can upload a sketch; place a resistor between pin PC14 and 3.3V, and then reset the board. You should now be able to flash a blank sketch, remove the resistor, and restart the board, after which uploading new sketches should work as expected. If you find that the IDE successfully resets your board, but dfu-util complains about no DFU-devices being present you may have to edit the maple-upload script in tools-folder. Find the line where it calls upload-reset, and increase the value given to it.
Wiki: Blue_Pill
