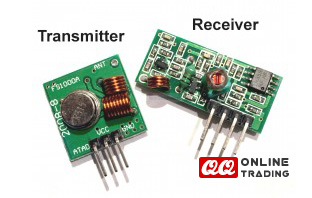
RF Wireless 315 / 433 MHz Transmitter & Receiver Module Pair
- Was RM15.00
-
RM9.50
- Product Code: rf-trasmitter-receiver-pair
- Availability: In Stock

Receiver Module Specifications:
Transmitter Module Specifications:
Here’s the library you need for this project:
- Download the RadioHead library
- Unzip the RadioHead library
- Install the RadioHead library in your Arduino IDE
- Restart your Arduino IDE
The RadioHead library is great and it works with almost all RF modules in the market. You can read more about this project here
| RF Receiver XY--MK-5V |
Arduino |
| GND | GND |
| DATA | - |
| DATA | Analog Pin-1 |
| VCC | 5V |
Follow the circuit above for your receiver. Then upload the code below.
#include <RH_ASK.h>
#include <SPI.h> // Not actualy used but needed to compile

RH_ASK driver;

void setup()
{
    Serial.begin(9600); // Debugging only
    if (!driver.init())
         Serial.println("init failed");
}

void loop()
{
    uint8_t buf[12];
    uint8_t buflen = sizeof(buf);
    if (driver.recv(buf, &buflen)) // Non-blocking
    {
      int i;
      // Message with a good checksum received, dump it.
      Serial.print("Message: ");
      Serial.println((char*)buf);
    }
}
| RF Transmitter FS1000A / XY-FST |
Arduino |
| DATA | Digital Pin-4 |
| VCC | 5V |
| GND | GND |
Follow the circuit above for your transmitter. Then upload the code below.
#include <RH_ASK.h>
#include <SPI.h> // Not actually used but needed to compile

RH_ASK driver;

void setup()
{
    Serial.begin(9600);   // Debugging only
    if (!driver.init())
         Serial.println("init failed");
}

void loop()
{
    const char *msg = "Hello World!";
    driver.send((uint8_t *)msg, strlen(msg));
    driver.waitPacketSent();
    delay(1000);
}
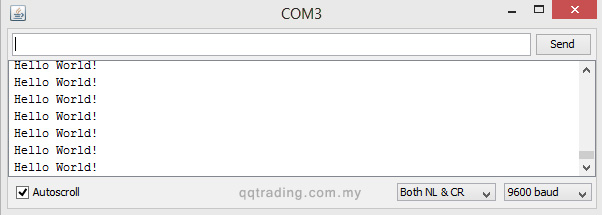
In this project, the transmitter is sending a message “Hello World!” to the receiver via RF. Those messages are being displayed in the serial monitor from the receiver. Here’s what you should see in your Arduino IDE serial monitor.

Tags: RF