Temperature & Humidity Control w/ LCD Display - XY-WTH1
-
RM85.00
- Product Code: XY-WTH1
- Availability: In Stock
multifunction delay relay module.LCD display, very clear, easy to use, powerful.It can be widely used at Smart home,Industrial control,Automatic irrigation,Indoor ventilation.Protection equipment.
Applications
Features
Specifications
Package


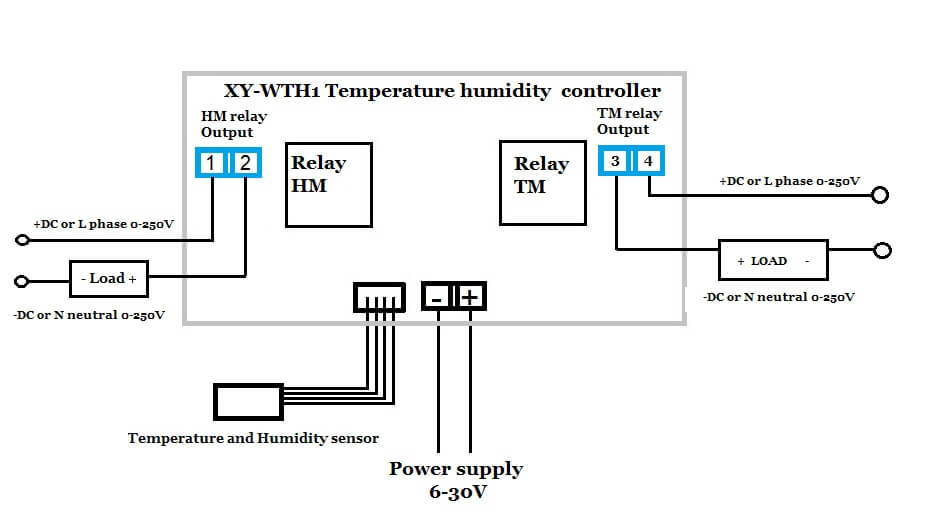
Load can be max 10A .
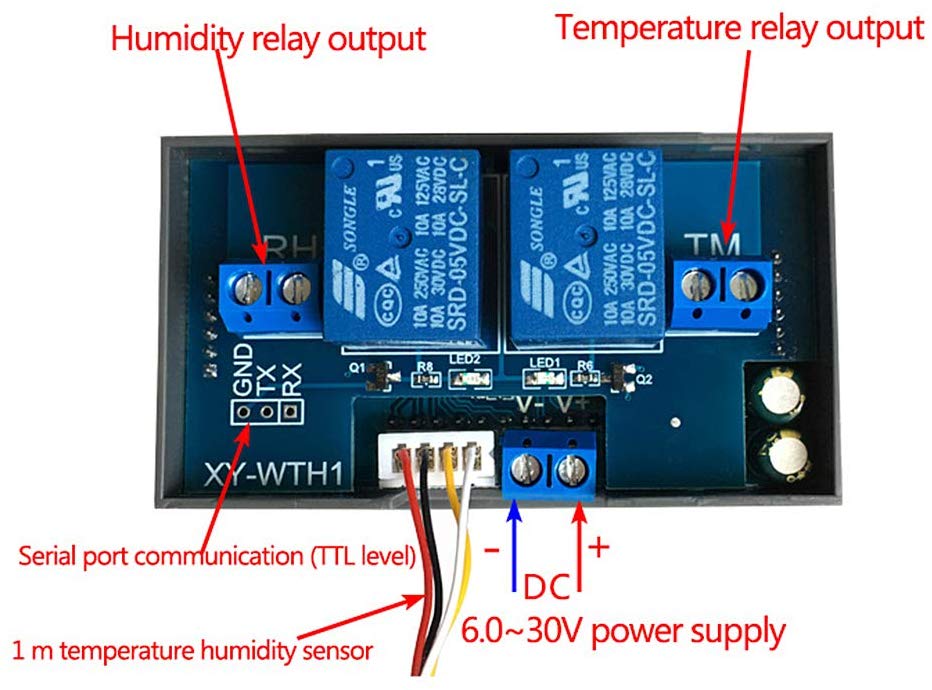
LOAD means a heater or a cooling compressor for TM relays. The humidifier or dehumidifier is for HM relay output
The relay output is not it is not “electrically” connected to the XY-WTH1 electronics so we can also control the 110V or 220V voltage.
How to set the temperature for heating or cooling:
The automatic identification of work mode:
The system automatically according to the start/stop temperature, identify work mode
How to set the start/stop temperature:
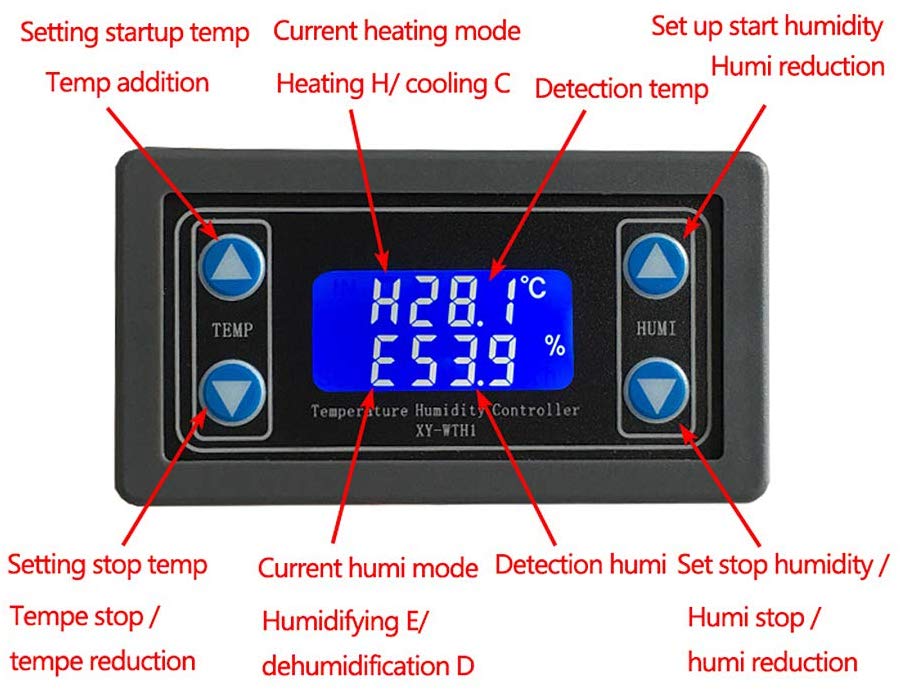
1. In the running interface, Long Press TEMP+ key more than 3 seconds, into the start temperature settings interface, can be modified by TEMP+ TEMP- key, to be modified, waiting for 6s automatic exit and save
2. In the running interface, Long Press TEMP- key more than 3 seconds, into the stop temperature settings interface, can be modified by TEMP+ TEMP- key, to be modified after the parameters, waiting for 6s automatic exit and save
Cooling mode:
When the temperature ≥ Start temperature, relay conduction, red led on, refrigeration equipment begin to work.
When the temperature ≤ Stop temperature, relay disconnect, red led off, refrigeration equipment stop to work.Heating mode:
When the temperature ≤ Start temperature, relay conduction, red led on, heating equipment begin to work.
When the temperature ≥ Stop temperature, relay disconnect, red led off, heating equipment stop to work.OFE -Temperature correction function calibration (-10.0 ~ 10℃):"
The system is working for a long time and may be biased, through this function correction, the actual temperature = measuring temperature + calibration value;
How to set humidity control humidification or dehumidification:
The automatic identification of work mode:
The system automatically according to the start/stop humidity, identify work modeStart humidity> stop humidity, dehumidification mode ‘D’
Start humidity< stop humidity, humidification mode ‘E’
How to set the start/stop humidity:
1. In the running interface, Long Press ‘ HUMI+ ‘ key more than 3 seconds, into the start humidity settings interface, can be modified by HUMI+ HUMI– key, to be modified, waiting for 6s automatic exit and save.
2. In the running interface, Long Press ‘ HUMI-‘ key more than 3 seconds, into the stop humidity settings interface, can be modified by HUMI+ HUMI- key, to be modified after the parameters, waiting for 6s automatic exit and save.
Dehumidification mode:When the humidity≥ Start humidity, relay conduction, green led on, dehumidification equipment begin to work.
When the humidity≤ Stop humidity, relay disconnect, green led off, dehumidification equipment stop to work.
Humidification mode:
When the humidity≤ Start humidity, relay conduction, green led on, humidification equipment begin to work.
When the humidity≥ Stop humidity, relay disconnect, green led off, humidification equipment stop to work.
RH-Humidification correction function calibration (-10.0 ~ 10%):
The system is working for a long time and may be biased, through this function correction, the actual humidity = measuring humidity + calibration value.
TTL programiming from UART:
| CMD | Description |
|---|---|
| start | start data upload |
| stop | stop data upload |
| read | Read the param setting |
| T:ON | Temperature relay enable |
| T:OFF | Temperature relay disable |
| H:ON | Humidity relay enable |
| H:OFF | Humidity relay disable |
| TS:XX.X | Set start Temperature (-20.0~60.0) |
| TP:XX.X | Set stop Temperature (-20.0~60.0) |
| HS:XX.X | Set start Humidity (00.0~100.0) |
| HP:XX.X | Set stop Humidity (00.0~100.0) |
| TC:XX.X | Set Temperature Calibration (-10.0~10.0) |
| HC:XX.X | Set Humidity Calibration (-10.0~10.0) |